Nespresso Guides
Dolce Gusto Milk Frother Not Working? – Here’s 4 Tips To Fix It
Have you switched on your Dolce Gusto machine, like any other day, to only suddenly discover that the milk frother is not frothing?
Don’t panic. Take a breath.
This is a super common issue with Nestle’s Dolce Gusto machines and, luckily, fixing it is pretty easy too.
So instead of rushing out and buying a new one, or heading to a café for plan B, it’s likely you can fix it all by yourself!
In this troubleshooting guide, we’ll tell you some likely reasons why your Dolce Gusto frother isn’t frothing milk, explain some simple causes of the problem, and provide the fixes to get your back up and running again.
Why Listen To Us? Well, because we KNOW coffee! In fact, we make our own coffee, coffee machine cleaners, and reusable capsules which we've sold to over 41 countries. Our team ouf experts include Tristan (an engineer), Claire (a food writer) and Richy (a barista). So, whether you're looking for a recipe or repair guide, we've got you covered 💚
Table of Contents
Why Is Dolce Gusto Milk Not Frothing?
In order to fix an appliance, you need to detect the exact cause of the issue first. We’ve found the top 6 reasons your magnetic milk frother isn’t frothing milk are the following:
- Dirt on the electrical contacts
- Gunk on the magnetic whisk
- Broken/lost magnetic whisk
- A Burnt out heating element
- A Burnt out thermocouple
- Beyond Repair?
Let’s go through these in order of how likely it is to be the problem, and discuss how to fix it.

1. Dirt On The Electrical Contacts – Easy Fix
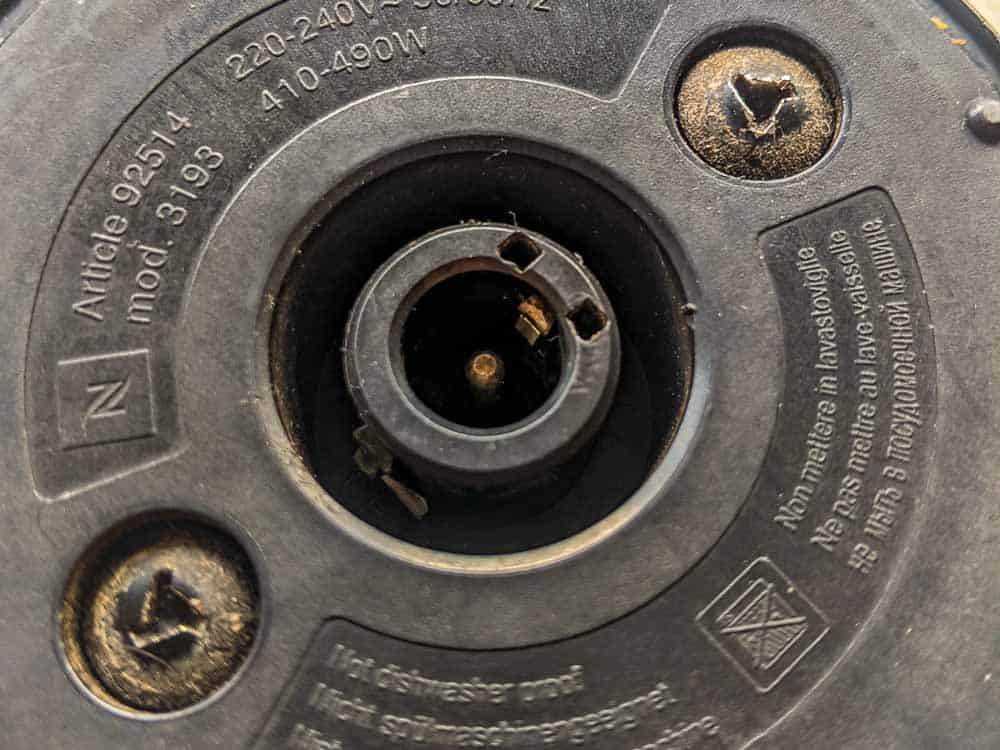
The Aeroccino milk frother gets it power through a round plastic connector on the bottom of the device. There is a female connector on the milk canister, and a male plug on the Nespresso machine. Sometimes this is a standalone base station too based on what model machine you have – but the functionality is the same.
Both these connectors tend to build up grease, gunk and milk residue. Especially if you have an overflow.
If the machine isn’t turning on, or seems to be receiving power intermittently then this is most likely the cause!
Crusted milk residue is usually the main form of dirt that gets accumulated in a frother over time – especially if you’ve had a couple of boil overs. Once dirt begins accumulating it will also trap moisture, and start corroding the contacts.
Solution:
The easy solution to this is just giving the plate a good clean with soap water and treating the contacts with contact cleaner. You’ll need:
- Dishcloth
- Dish soap
- Isopropyl alcohol or Methylated spirits.
- Toothbrush or small wire brush.
- Contact cleaner spray.
Start by switching off your machine and unplugging it (just to be safe). Turn the frother canister upside down and inspect both the connects on the canister and the base station.
Take a small brush, and a cup of soapy water and scrub thoroughly until you can see that the gunk has been removed. A toothbrush is perfect for this task and we keep one dedicate for the task with our descaling product and other cleaning products. If the contacts are quite corroded, a wire brush may be better suited.
Rinse the soapy water off. Dry thoroughly and scrub again this time using alcohol. Once done, give a generous spray of contact cleaner spray.

2. Gunk On The Magnetic Whisk – Beginner
If the milk frother is receiving power, the next step is to check the milk whisk is working correctly.
- If the milk is heating, but the whisk isn’t spinning keep reading this and step 3.
- If the milk isn’t heating, then jump to step 4 and 5.
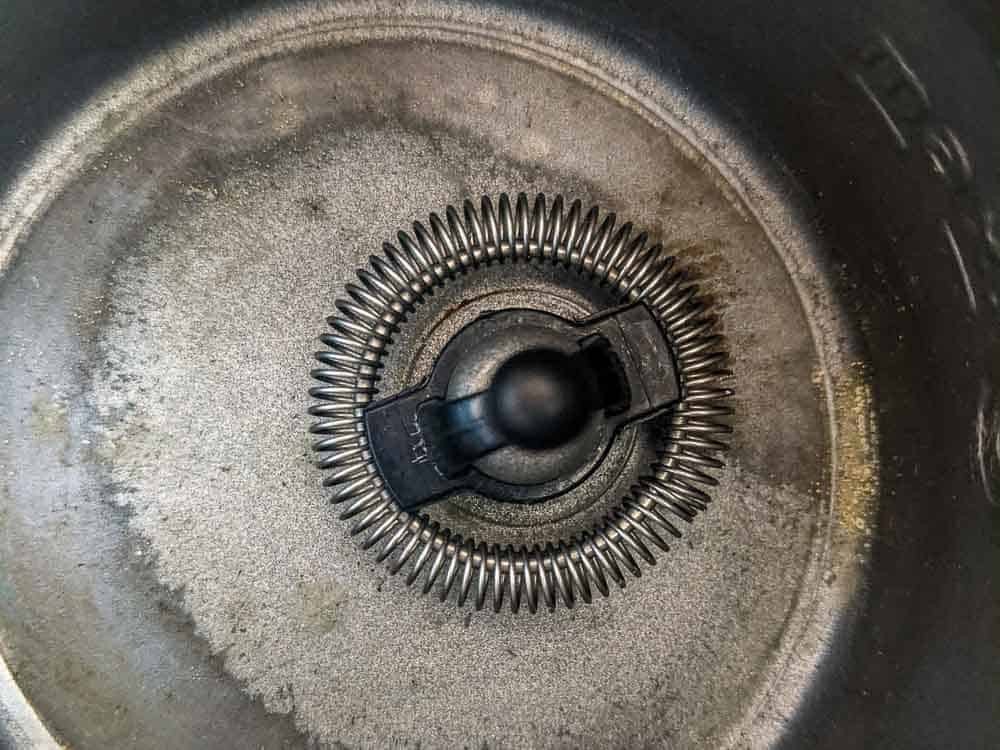
Milk residue will build up on the whisk over time. For those of you who don’t remove the whisk and rinse it between each brew, then this one definitely applies to you.
There is a very small tolerance between the hole in the whisk, and the nipple it slips over inside the canister. If this fills with gunk, the whisk won’t be able to spin freely.
Solution
The easy solution to this is just giving the whisk a good clean with a powerful cleaning solution. You’ll need:
- Half a cup of white vinegar
- 1 table spoon of salt
- Toothbrush or small wire brush.
Mix the salt and vinegar together in a glass jar and place the whisk inside to soak for a few hours or overnight. Once soaked, remove, rinse with clean water, and the nscrub with the toothbrush to remove and lingering dirt.
Return the whisk to your milk frother and you should be good to go!

3. Broken magnetic whisk
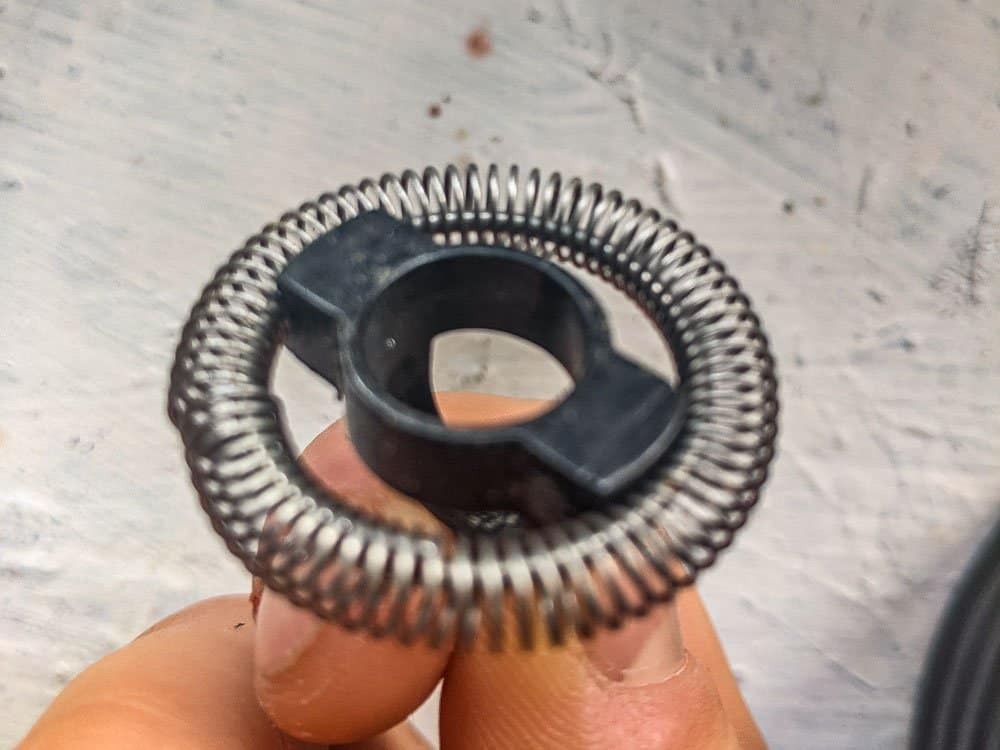
Sometimes through general wear and tear, or the occasional freak accident, you may end up damaging or breaking the magnetic whisk attachment.
A common issue here is when the small neodymium magnet falls out and gets lost, thereby rendering the whisk useless.
Solution:
It’s easy to buy a replacement whisk to fit your aeroccino milk frother. You can get these from your Nespresso dealer, but we find this isn’t cheap, and there can be quite long delays getting the parts in as most shops don’t keep them on hand.
We’ve found going straight to amazon is the easiest option, and have two favorites (which we think are actually better than the original one!)
The Secura Milk Frother is only $40 USD and will froth 8.4oz/250ml of milk – more than enough for one cup of coffee. It also is one of the best-looking frothers we’ve seen, and its all stainless steel body makes it super easy to clean.
Our other recommendation is a little pricey, but it’s absolutely essential if you have a big family, or love to entertain. The Smeg Milk Frother has a whopping 20oz capacity, which is enough for four small coffees, or 2 giant bowl-type coffees. Its also Smeg – so you know it’s good!
4. A Burnt Out Heating Element – Advanced Fix
The following fixes involve taking things apart that are hard to put back together again. They involve dealing with electricity, which poses a risk of electrocution and fire. If this doesn’t sound like you then the best thing you can do is to contact the professional.
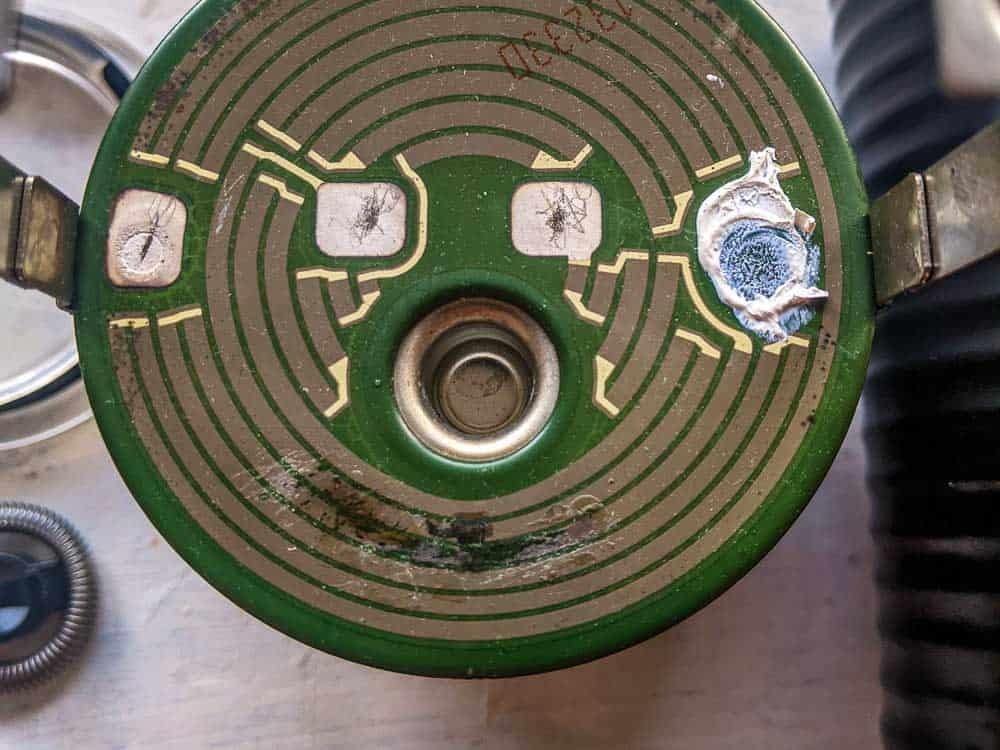
The heating element inside the Aeroccino frother is nothing more than a copper strip on a printed circuit board. This is a pretty cheap (read: cost cutting) design choice, and as a result is a very common point of failure for devices that have been used a lot.
They’ll be able to easily inspect it and fix it for you in case they detect any serious problem.
Solution:
Open up the canister to gain access to the PCB. You’ll be able to easy see where the track has burnt up is this is indeed the culprit.
We were able to repair this fault by soldering a small strip of copper over where the track had burnt up. To do this we had to scrape back some of the enameling to get access to some good copper.
5. A Damaged Thermocouple – Advanced Fix
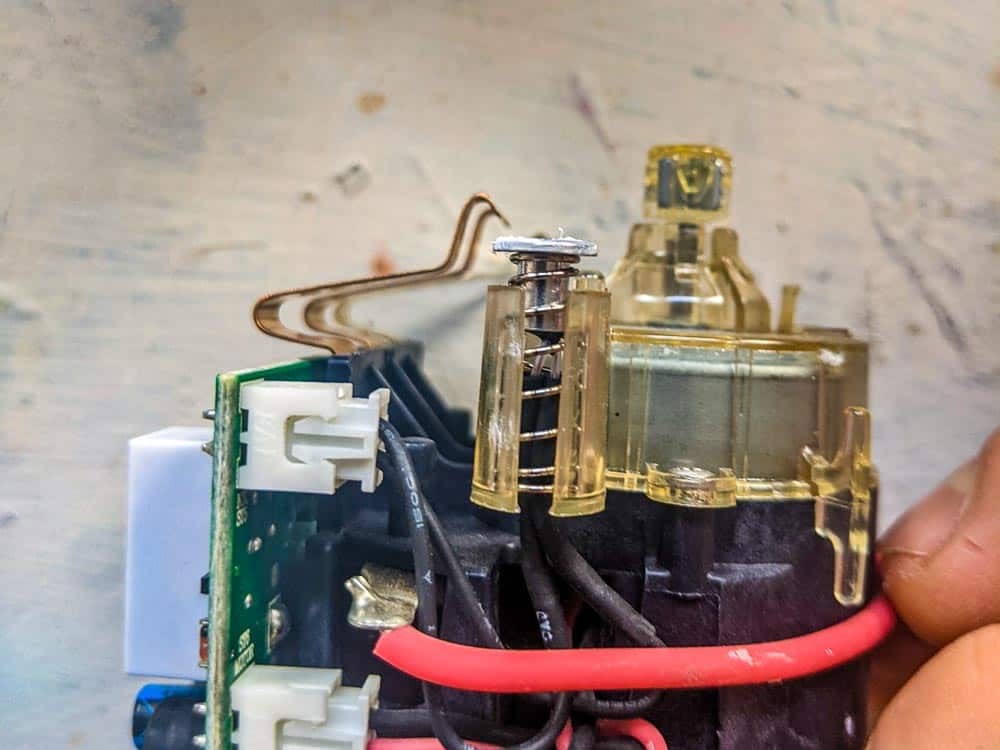
The thermocouple is the small electronic temperature sensor that sits inside the milk frother. It’s used to monitor the temperature of the milk and turn off the device once the optimum milk temperature is reached.
Unfortunately this device can become damaged or burn out. A failed thermocouple will tell the controller that the desired temperature is reached, even before the operation has started. This means your milk frother will turn on, and then turn off again straight away!
Solutions:
You’ll need to replace the thermocouple. This disconnects easily from the PCB via a slip connector. When you put the new one in, make sure to apply some thermal grease to make sure it conducts the temperature ok.
We found a compatible thermocouple here on amazon: Link
6. Beyond repair? Get a replacement.
Sometimes things just aren’t worth fixing. If you’ve found the motor has blown, or any of the fixes above haven’t managed to solve your problem, then the best thing may be to buy a replacement frother.
These are pretty easy to come by with 3rd party resellers listing new and second hard parts on sites like Amazon and EBay.
Just before you purchase, make sure to get the right one for your machine. We’ve linked some of the most common frothers down below for your convenience:
Final Thoughts
When your Aeroccino milk frother start performing poorly, there are a 6 likely causes that are common common reasons responsible for causing the issue.
One of the problems is the accumulation of dirt and the other one is the misaligned wand. Both problems are easily fixable, especially if you follow the instructions and tips mentioned above. So if you want to fix the problem all by yourself, all you need to do is to take the necessary steps mentioned in this article. However, if the frother itself is broken, you’ll need to ask a professional for help to successfully solve the problem.

