Keurig Guides, Keurig Machines
How Long Does A Keurig Machine Last? (8 Tips To Keep ‘Em Running)
Keurig Machines are pretty hardy and there are only a limited number of issues that can cause them to break. If you want to prolong the life of your Keurig machine and to keep the coffee tasting as good as possible, then regular descaling and general cleanliness is essential.
In this guide, we’ll take a look at how long a Keurig machine will typically last, what goes wrong, and what you can do to prevent these things from happening!
Why Listen To Us? Well, because we KNOW coffee! In fact, we make our own coffee, coffee machine cleaners, and reusable capsules which we've sold to over 41 countries. Our team ouf experts include Tristan (an engineer), Claire (a food writer) and Richy (a barista). So, whether you're looking for a recipe or repair guide, we've got you covered 💚
Table of Contents
How Long Does A Keurig Machine Last?
The lifespan of most Keurig machines can be anywhere between 5 and 10 years, depending on the type. Keurig machines are generally made of quality parts and a tried-and-tested designs which means they should be on the mid to upper end of that range. By following a sensible maintenance regime, you should be able to get 10 years out of your coffee machine.
I’ve come up with my top 8 tips to make your Keurig last long above its 10 year life span
- Descaling every three months is recommended.
- Don’t let the water tank run dry to prevent damage to the machine.
- Keep your machine in a cool, dry place to prevent mechanical fatigue and component failure.
- Use appropriate-sized third-party capsules or cups to prevent damage to the machine.
- Use filtered water to reduce mineral buildup in the machine.
- Avoid using overly fine or flavored coffee grounds to prevent clogs.
- Clean the needle that punctures the cups regularly to ensure proper flow.
- Avoid running hot chocolate or other non-coffee beverages through the machine, as they can leave residue that is difficult to clean.

Tip 1: Descale Your Keurig Machine
Think about your typical café coffee experience. Some will serve delightful coffee that always tastes pristine, yet other establishments, serving the same variety of coffee present you with odd liquids that taste nothing like a coffee should. Of course, there are plenty of variables that go into making a good coffee, but the most likely culprit is how well they clean the coffee machines.
People sometimes say to us that “their coffee machine just went wrong suddenly.” This is rarely true and typically there are clues that something is wrong, well before they cease to function correctly. Pay attention to your machine and your machine will have indications that all is not well.
The very first sign of a problem that you will notice is that the taste is not right. The reason you originally purchased a Keurig was for the taste, so I hope that you will notice if it does not taste as good as it used to. Do not just put it down to your imagination***. Carry out an immediate descaling***.
What is Descaling, and why should I do it?
All coffee machines build up deposits of calcium and limescale when in regular use. How fast this happens will depend on your local water. Some have higher levels of calcium than others. Descaling is the removal of these deposits, and to extend the life of your machine you should do this regularly.
Keurig suggests that you should do this at least every three months. A good habit to get into is to descale after every 300 cups. The whole descaling process should take as little as 20 minutes.
To carry out descaling you will need a “Descaling Solution” which you can either purchase directly from Keurig or cheaper here on Amazon. We found this descaling solution to work well.
How to descale a Keurig machine:
Most Keurig machines follow similar steps to run a descaling process.
- Empty the water reservoir
- Fill the reservoir with the correct amount of water and mix in a sachet of descaling solution.
- Place a large cup on the drip tray
- Turn on the machine
- Run the largest brew size
- Discard the cup contents
- Repeat until the “Add Water” light comes on
- Let the machine sit for 30 minutes
- Rinse the reservoir and fill it with fresh water
- Run the largest brew size until the reservoir is empty
- Discard the cup contents
- Wait for the machine to cool off before using it again
If this is a little confusing, or you’d like a complete step-by-step guide for your machine, you can check out our detailed descaling guides for each make of Keurig machine:
- How to descale your Keurig K-Elite coffee machine.
- How to descale your Keurig K-Select coffee machine.
- How to descale your Keurig K-Mini coffee machine
- How to descale your Keurig K-Cafe coffee machine
Not the right machine for you? Check out our other descaling guides for Keurig coffee machines below:
Tip 2: Don’t ever let the water tank run dry!
Unfortunately, most Keurig machines can’t detect if their water tank is empty (or about to run out of water). This means the machine is will go ahead and try to pump from the tank as per usual, even if there is no water there!
If this happens, the pump will draw air into the system instead, and this does a few really bad things to your coffee machine.
- Creates pockets of steam (and pressure) when these air bubbles enter the heating element
- Air in the heating element can cause the element to burn out (since there’s no water to keep it cool)
- Enough air can cause the water pump to lose its suction which will slow down or stop water from moving altogether!
If you do this enough times, it’s only a matter of time before you’re going to run into some problems.
I always check that my water reservoir is at least half full before making any coffee, and suggest everyone does the same. It’s especially easy when making a few coffees in quick succession to lose track of the water level and let it run dry!
Tip 3: Keep your machine in a cool, dry place
It’s worth considering where you park your prized Keurig as it can affect the longevity of the machine in the long run.
- Keep out of direct sunlight – Most Keurig machines have black outer casings which can absorb a lot of heat when left in direct sunlight. This heating causes the components to expand and contract – leading to mechanical fatigue and eventually causing parts to crack and fail
- Keep Dry – water always finds its way in, so make sure not to leave your machine in a wet area, or on a wet countertop. The ingress of water can cause components to rust or corrode internally and can cause the electronics to fail too.
- Sea breeze – Salt air from being near the sea is super corrosive and will to the same damage in months as you would see in years of regular use. If your home is near the sea, consider keeping your Keurig machine in a cupboard or drawer.
Tip 4: Third-Party Capsules
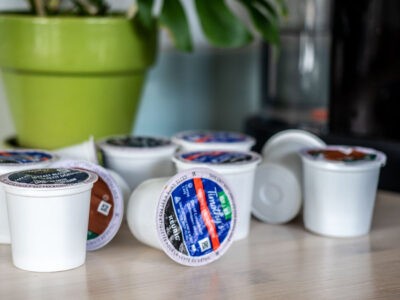
Not all third-party coffee pods are created equal, and the size can vary a lot between manufacturers.
Using a pod that is too big or too small can not only damage the capsule holder mechanism but can also lead to leaks and pressure imbalances.
If it doesn’t fit, it doesn’t fit. Many people have broken their machines these days by using the wrong sized pods.
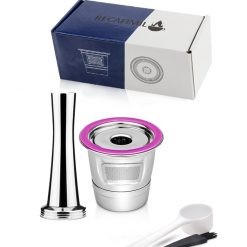
Our Green Pods have been specifically designed to fit Keurig capsule mechanism but we can’t guarantee the same for others, so be aware of cheap Chinese knock-offs!
-
Reusable Keurig K-Cup Coffee Pods$39.95 NZD – $89.95 NZD
-
Reusable Keurig K-Cup Coffee Pods – Starter Pack$45.95 NZD – $79.95 NZD
Tip 5: Use filtered water to reduce mineral buildup in the machine
Using filtered water can help reduce the amount of minerals that build up in your Keurig machine over time. Regular tap water can contain minerals such as calcium and magnesium that can accumulate and cause damage to the heating element and other components of the machine. By using filtered water, you can reduce the amount of mineral buildup and prolong the life of your Keurig machine. Additionally, using filtered water can improve the taste of your coffee by removing any unpleasant flavors or odors that may be present in tap water.
Tip 6: Avoid using overly fine or flavored coffee grounds, which can clog the machine
Using overly fine or flavored coffee grounds can clog the machine, which can cause it to malfunction or even break down over time. This is because the machine is not designed to handle these types of coffee grounds, which can cause residue to build up and block the system. By avoiding these types of coffee grounds, you can prevent damage to your Keurig machine and prolong its life.
Tip 7: Clean the needle that punctures the cups regularly to ensure proper flow
Cleaning the needle that punctures the cups on your Keurig machine regularly can improve the life of your machine by ensuring proper flow. Over time, coffee grounds and other debris can accumulate on the needle, which can cause clogs and prevent the machine from working properly. By cleaning the needle regularly, you can prevent these clogs from forming and ensure that the machine is able to function as it should. This can help to extend the life of your Keurig machine and prevent the need for costly repairs or replacements down the line.
Tip 8: Avoid running hot chocolate or other non-coffee beverages through the machine, as they can leave residue that is difficult to clean
Running non-coffee beverages such as hot chocolate through your Keurig machine can leave residue that is difficult to clean. This residue can build up over time and cause clogs, which can prevent the machine from working properly. By avoiding these types of beverages, you can prevent damage to your Keurig machine and prolong its life.
BONUS: Our Suggested Daily Maintenance Routine To Maximize The Life Of Your Keurig Machine
I carry out this routine every morning once I’m finished making coffee for the day, so my machine is set and ready to go the next morning. Making it a habit at a certain time works best and you have more chance of remembering.
- Purge the machine with fresh water to flush out any coffee residue.
- Empty the used capsule container – Coffee grounds contain oils that go rancid and if you leave capsules too long in the used capsule container you are not helping your machine stay fresh. They also will continue to leak coffee juices.
- Replace the water in the water reservoir and make sure it’s completely full each day. Clean the water tank each week.
- Wipe down the exterior surfaces of the machine with a damp cloth.
- Make sure the countertop is dry and there are no puddles beneath the machine.
Final Thoughts
In this article, we’ve shared some tricks we’ve picked up as long-time Keurig users which can help you increase the life span of your Keurig machine by carrying out a simple maintenance routine.
Not only will this help you preserve your investment (saving money in the long term), but it will also ensure that the taste of your coffee remains as good as it was when you first invested in the Keurig System.


